< Previous
Next >
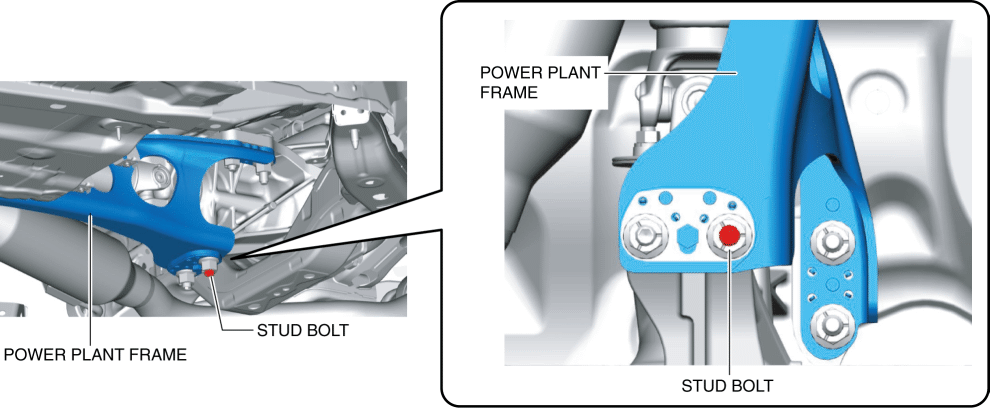
POWER PLANT FRAME INSTALLATION [M66M-D]
CAUTION:
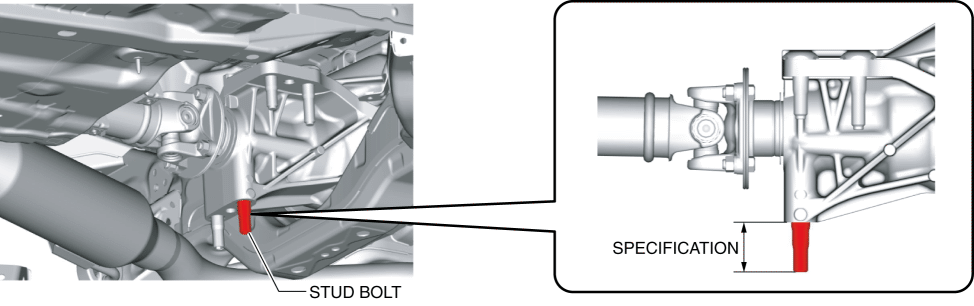
The stud bolt shown in the figure is pressed into the power plant frame. Read the cautions carefully so as not to damage the parts while servicing.
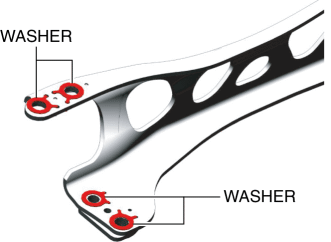
1. Install the washers.
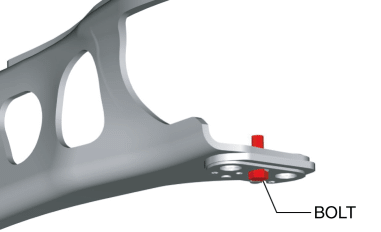
2. Install the bolt.Tightening torque
5.0—9.0 N·m {51—91 kgf·cm, 45—79 in·lbf}
3. Install the stud bolt to the differential.Tightening torque
25—35 N·m {2.6—3.5 kgf·m, 19—25 ft·lbf}
Verify that the projection amount of the stud bolt is within the specification.
Specification
36.5—38.5 mm {1.44—1.51 in}
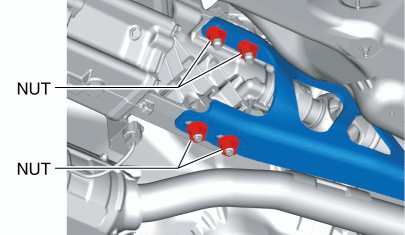
4. Assemble the power plant frame from the rear differential side and temporarily tighten all the nuts.
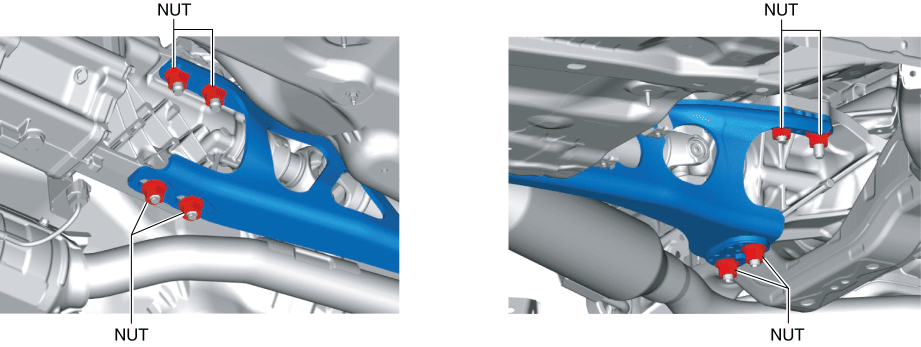
5. Tighten the nut shown in the figure to the specified torque.
Tightening torque
164—200 N·m {17—20 kgf·m, 121—147 ft·lbf}
6. Tighten the nut shown in the figure to the specified torque.
Tightening torque
164—200 N·m {17—20 kgf·m, 121—147 ft·lbf}
7. Retighten the nut shown in the figure to the specified torque.
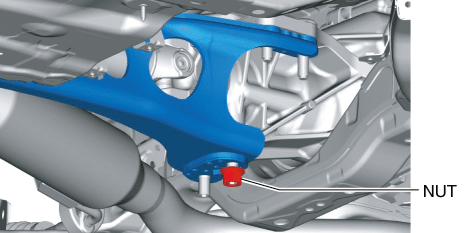
Tightening torque
164—200 N·m {17—20 kgf·m, 121—147 ft·lbf}
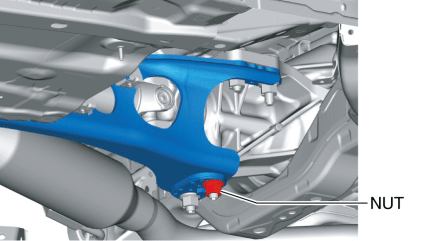
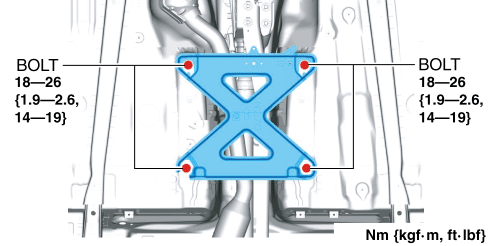
8. Install the nuts shown in the figure in the following order.

Tightening torque
164—200 N·m {17—20 kgf·m, 121—147 ft·lbf}
a. Tighten the nut (front side) to the specified torque.b. Tighten the nut (rear side) to the specified torque.c. Retighten the nut (front side) to the specified torque.
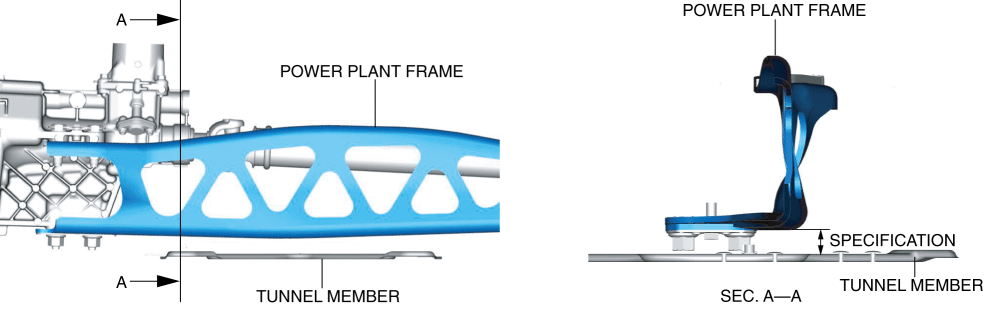
9. Install the tunnel member.
10. Adjust the height of the transmission using a transmission jack, and verify that the power plant frame installation position is within the specification.Specification
Between bottom surface of power plant frame and top surface of tunnel member: 22.4—28.4 mm {0.89—1.11 in}
11. Tighten the nuts (4 locations) on the transmission side.
Tightening torque
135—164 N·m {14—16 kgf·m, 100—120 ft·lbf}
12. Remove the rubber or rag from the transmission jack and between the rear differential and rear crossmember.
13. Verify that the power plant frame installation position is within the specification indicated in Step 10.
If not within the specification, repeat from Step 10.
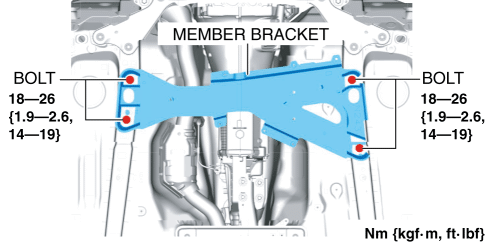
14. Install the member bracket. (With member bracket)< Previous Next >