MX5 mk4 Manual
Home bodyshop manual wiring diagram workshop manual service highlights transmission overhaul

Knowledge Base

Free to use workshop manual for your 2015+ Mk4 'ND' Mazda MX-5
Home


< Previous   Next >

HEADLIGHT AIMING

NOTE:

  • If the following servicing is done, perform the headlight aiming adjustment.

    • Front combination light replacement

    • Suspension replacement and removal/installation, servicing requiring vehicle height to be changed

  • If servicing was done which changes the vehicle height, perform the headlight auto leveling system initial setting first to record the vehicle height under the unloaded condition to the auto leveling control module/AFS control module, then perform headlight aiming. (See HEADLIGHT AUTO LEVELING SYSTEM INITIALIZATION.)

1. Empty the vehicle except for the jack and vehicle tools.
2. Adjust the tire pressure to the specification. (See WHEEL AND TIRE SPECIFICATION.)
3. Move the vehicle to level ground.
4. Sit on the driver-side seat alone.
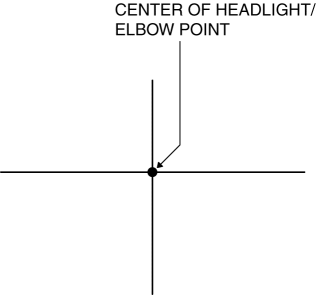
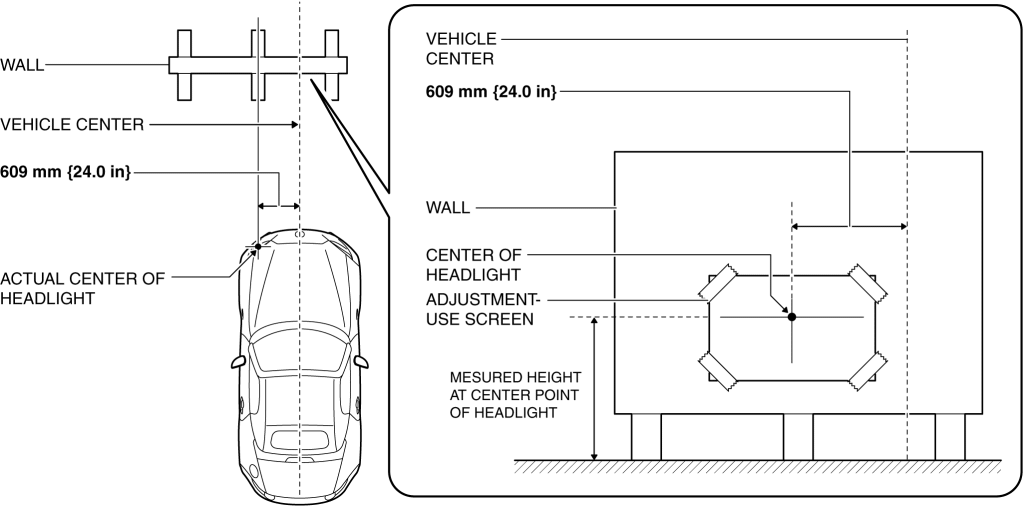
5. Make an adjustment-use screen as shown in the figure using double-weight, white paper.

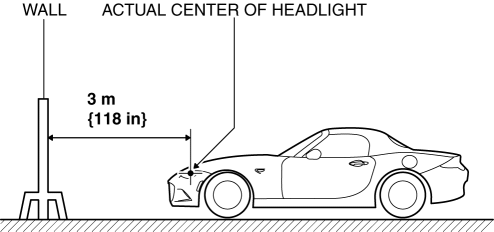
6. Line up the vehicle with the wall so that the distance to the headlights is 3 m {118 in} from the wall.

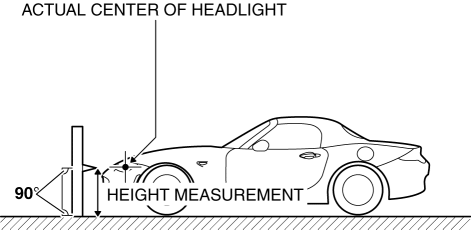
7. Measure the height at the center point of the headlight.

NOTE:

  • Measure the height at the center point of the headlight in which the aiming is being adjusted because the vehicle height differs depending on vehicle conditions.

8. Align the center of the headlight to be adjusted with the center of the headlight on the adjustment screen.

9. Set a partition in front of the headlight which is not being adjusted to block the light.
10. Start the engine and charge the battery.
11. Turn on the headlight low beams.

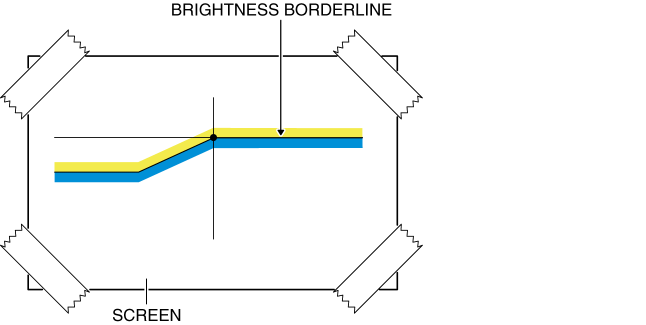
NOTE:

  • If the headlight low beams are turned on, the light as shown in the figure is emitted to the adjustment screen.

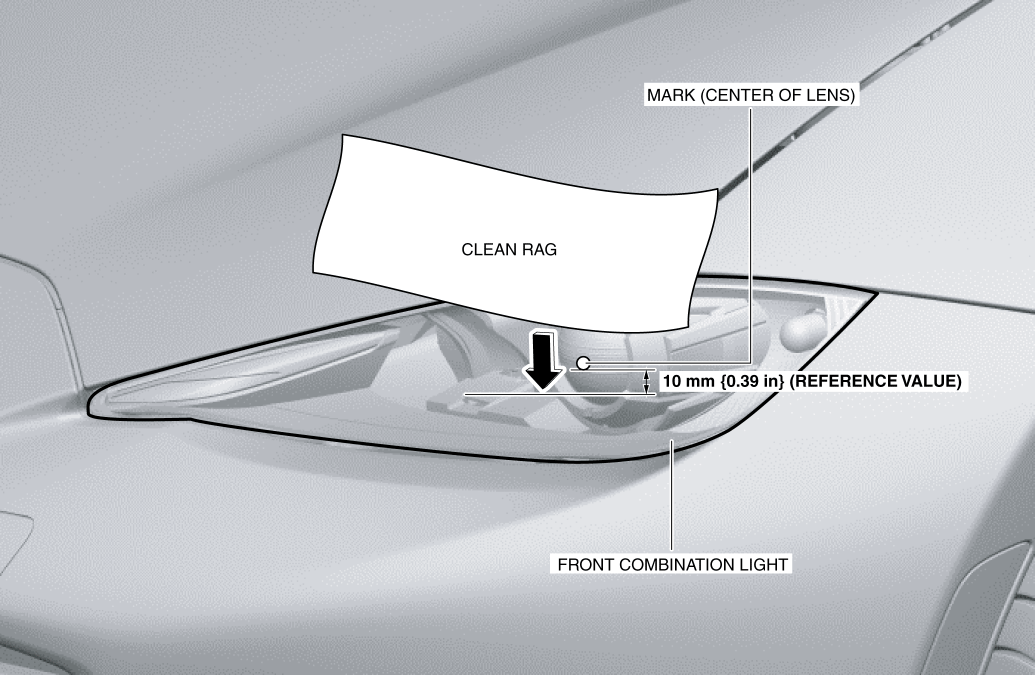
12. Cover the upper part of the headlight with a clean rag so that the brightness border line becomes transparent.

NOTE:

  • If the headlight is covered with a clean rag from the upper part of the headlight in the direction of the arrow shown in the figure, the yellow line disappears and the brightness border line becomes transparent.

13. Verify that the actual elbow point of the headlight is at the elbow point position indicated by the adjustment-use screen.

  • If the actual elbow point of the headlight is not at the elbow point position indicated by the adjustment-use screen, adjust by turning the aiming adjustment screw.

< Previous   Next >
 

Free to use workshop manual for your 2015+ Mk4 'ND' Mazda MX-5

COPYRIGHT NOTICE:
This fan site is not affiliated with Mazda, and is intended for personal, or commercial use only. The content of our web pages is for general information purposes only and is presented “as is”. We give no assurance or warranty regarding the accuracy of the contents. Readers should do their due diligence and seek the advice of an appropriately certified automotive technician before attempting any steps on this site. Original content provided by Mazda North America. The content of the manual is copyright under DMCA to: full.metal.resistor@gmail.com
LIMITATION OF LIABILITY:
We accept no responsibility for errors, inaccuracies, or omissions found on these pages. Additionally, we hereby exclude liability for any demands, claims, damages or losses of any kind with regard to any content or information provided on our web-site, including but not limited to incidental or consequential damages, direct or indirect loss, compensatory damages, loss of profits, or otherwise. By using this manual you assume full liablity for any procedures carried out on your vehicle, and are responsible for the vehicle remaining road legal and safe.
Site design © MX5 Docs 2019
Privacy policy
Cookies
X
We use cookies to improve your experience on
our site. By using our site you consent to cookies.
Learn more
I Agree