AUTO LEVELING CONTROL MODULE REMOVAL/INSTALLATION
NOTE:
The auto leveling control module stores the vehicle specification information.
A new auto leveling control module does not store any vehicle specification information.
When the ignition is switched ON after the auto leveling control module is replaced, the auto leveling control module reads the vehicle specification information sent via CAN transmission from the instrument cluster, and stores the vehicle specification information.
The auto leveling control module records the vehicle height while it is unoccupied.
Even if the battery is disconnected, the unoccupied vehicle height recorded by the auto leveling control module is not erased.
The new auto leveling control module does not record the vehicle height while it is unoccupied.
The auto leveling control module reads the vehicle height information from the auto leveling sensor and records the vehicle height while it is unoccupied when the headlight auto leveling system initial setting is performed after the auto leveling control module is replaced.
1. Disconnect the negative battery cable. (See NEGATIVE BATTERY CABLE DISCONNECTION/CONNECTION.)
2. Remove the following parts:a. Passenger-side scuff plate (See SCUFF PLATE REMOVAL/INSTALLATION.)b. Passenger-side front side trim (See FRONT SIDE TRIM REMOVAL/INSTALLATION.)c. Passenger-side A-pillar trim (See A-PILLAR TRIM REMOVAL/INSTALLATION.)d. Passenger-side lower panel (See PASSENGER-SIDE LOWER PANEL REMOVAL/INSTALLATION.)
3. Disconnect the connector.
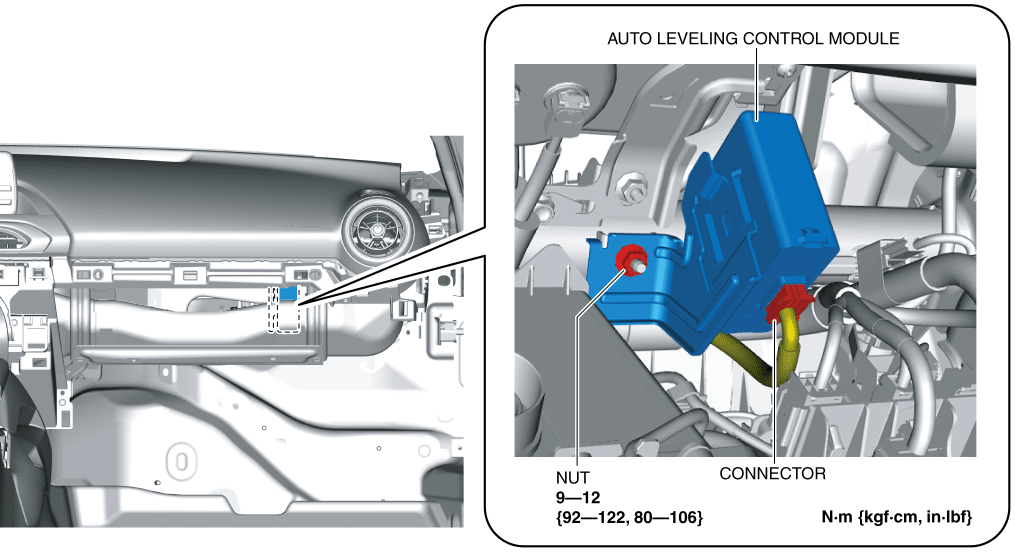
4. Remove the nut.
5. Remove the auto leveling control module.
6. Install in the reverse order of removal.
7. Perform the auto leveling control module automatic configuration using the following procedure.a. Switch the ignition ON (engine off or on) and wait for 1 min or more.b. Switch the ignition off and wait for 3 s or more.c. Switch the ignition ON (engine off or on) and complete the auto leveling control module automatic configuration.
8. Using the M-MDS, verify that DTCs U2300:54, U2300:55, or U2300:56 is not displayed.
If DTC U2300:54, U2300:55, or U2300:56 is displayed, go to the DTC troubleshooting procedure. (See DTC U2300:54 [AUTO LEVELING CONTROL MODULE].) (See DTC U2300:55 [AUTO LEVELING CONTROL MODULE].) (See DTC U2300:56 [AUTO LEVELING CONTROL MODULE].)
9. If the auto leveling control module is replaced with a new one, perform the headlight auto leveling system initialization. (See HEADLIGHT AUTO LEVELING SYSTEM INITIALIZATION.)< Previous Next >