RAIN SENSOR REMOVAL/INSTALLATION
Removal
1. Disconnect the negative battery cable. (See NEGATIVE BATTERY CABLE DISCONNECTION/CONNECTION.)
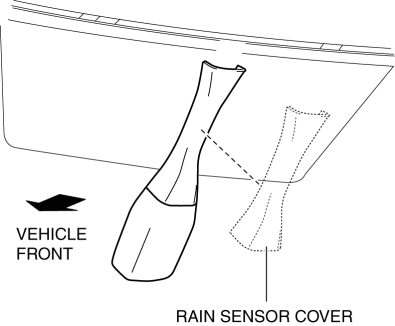
2. Open the rain sensor cover in the direction of arrows (1) shown in the figure and detach the rain sensor cover tabs from the rain sensor.
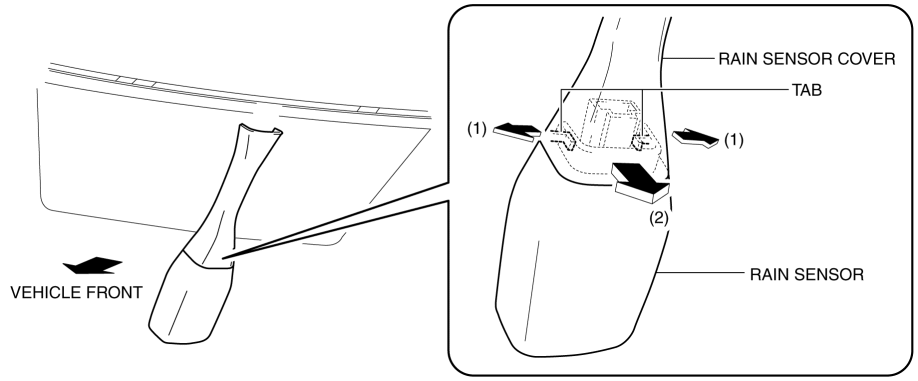
3. Remove the rain sensor cover from the rain sensor in the direction of arrow (2) shown in the figure.
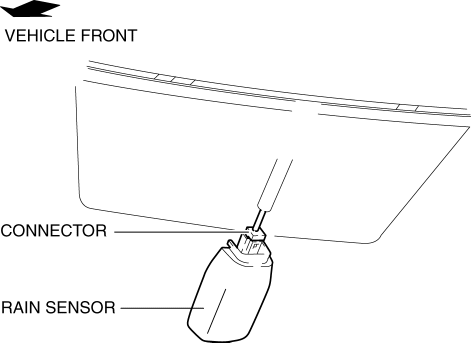
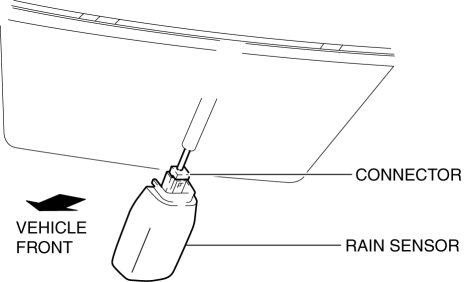
4. Disconnect the connector.
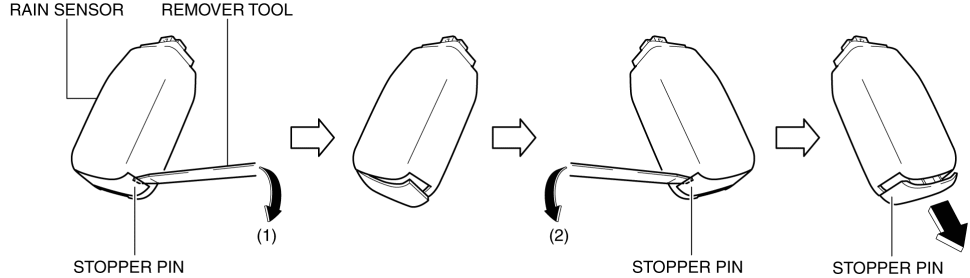
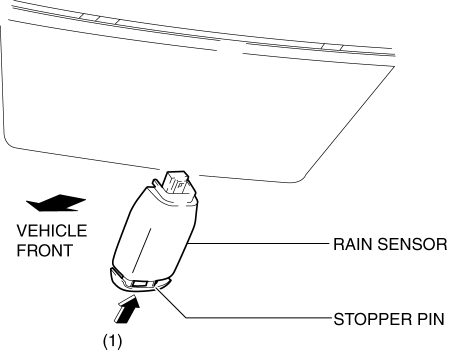
5. Move the remover tool in the directions of arrows (1) and (2) shown in the figure and detach the stopper pin.
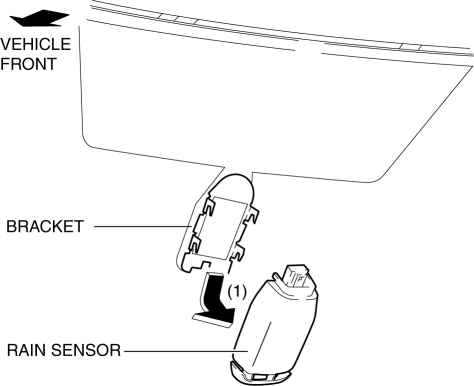
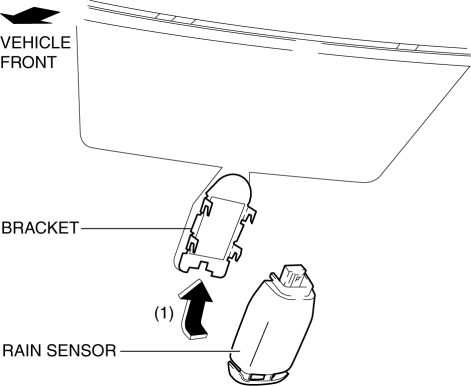
6. Move the rain sensor in the direction of arrow (1) shown in the figure and pull out the rain sensor from the bracket.
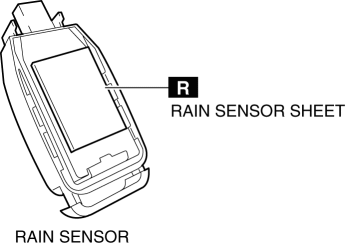
7. Peel off the rain sensor sheet from the rain sensor.
Installation
CAUTION:
If the rate at which the rain sensor reflects or transmits infrared light between the rain sensor and the windshield, or through the protective sheet, is changed, the rain sensor will determine that there is a problem in the rain detection function and stop the auto wiper system control. Be careful of the following when installing the rain sensor:
Do not reuse the rain sensor protective sheet.
Do not touch the rain sensor lens, rain sensor protective sheet, and sensor installation area on the windshield with your fingers.
Verify that there are no air bubbles after installing the rain sensor.
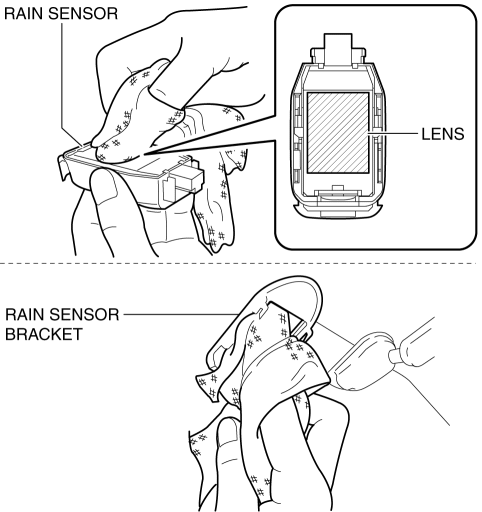
1. Wipe off any oil or dirt from the rain sensor lens and the windshield using a clean rag.
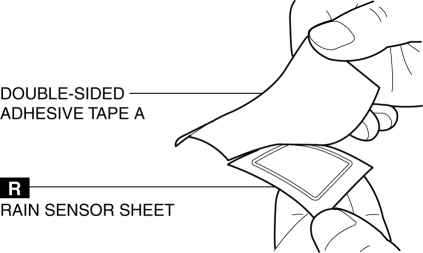
2. Peel off double-sided adhesive tape A from a new rain sensor sheet.
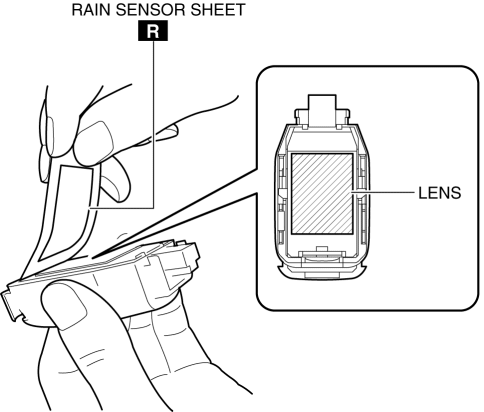
3. Adhere a new rain sensor sheet to the rain sensor lens.
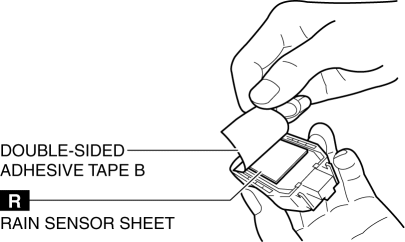
4. Peel off double-sided adhesive tape B from the rain sensor sheet.
5. Move the rain sensor in the direction of arrow (1) shown in the figure and install the rain sensor to the bracket.
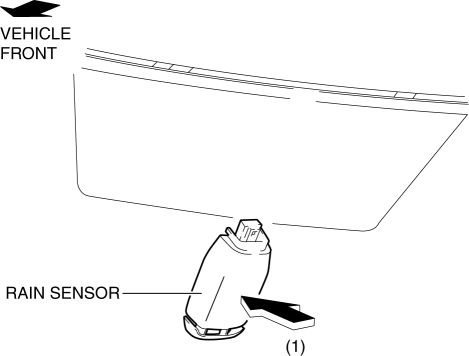
6. Press the rain sensor in the direction of arrow (1) shown in figure and press out any air bubbles.
7. Verify that there are no air bubbles between the rain sensor and the windshield.
8. Press the stopper pin in the direction of arrow (1) and secure the rain sensor to the bracket.
9. Connect the connector.
10. Install the rain sensor cover.
11. Connect the negative battery cable. (See NEGATIVE BATTERY CABLE DISCONNECTION/CONNECTION.)
12. If the rain sensor is replaced, perform the following sensitivity setting procedure for the auto lights.< Previous Next >CAUTION:
If the auto light sensitivity setting is not performed after replacing the rain sensor (auto light sensor), the rain sensor will be unable to detect the correct illumination level and the auto light/wiper system will not operate normally. If the rain sensor is replaced, perform the auto light sensitivity setting.
a. Using the M-MDS, verify the current auto light sensitivity setting. (See CONTROL SYSTEM PERSONALIZATION FEATURES SETTING PROCEDURE.)b. Change the sensitivity setting to a value other than the auto light sensitivity setting verified in Step 1.c. Re-set to the auto light sensitivity setting verified in Step 1.