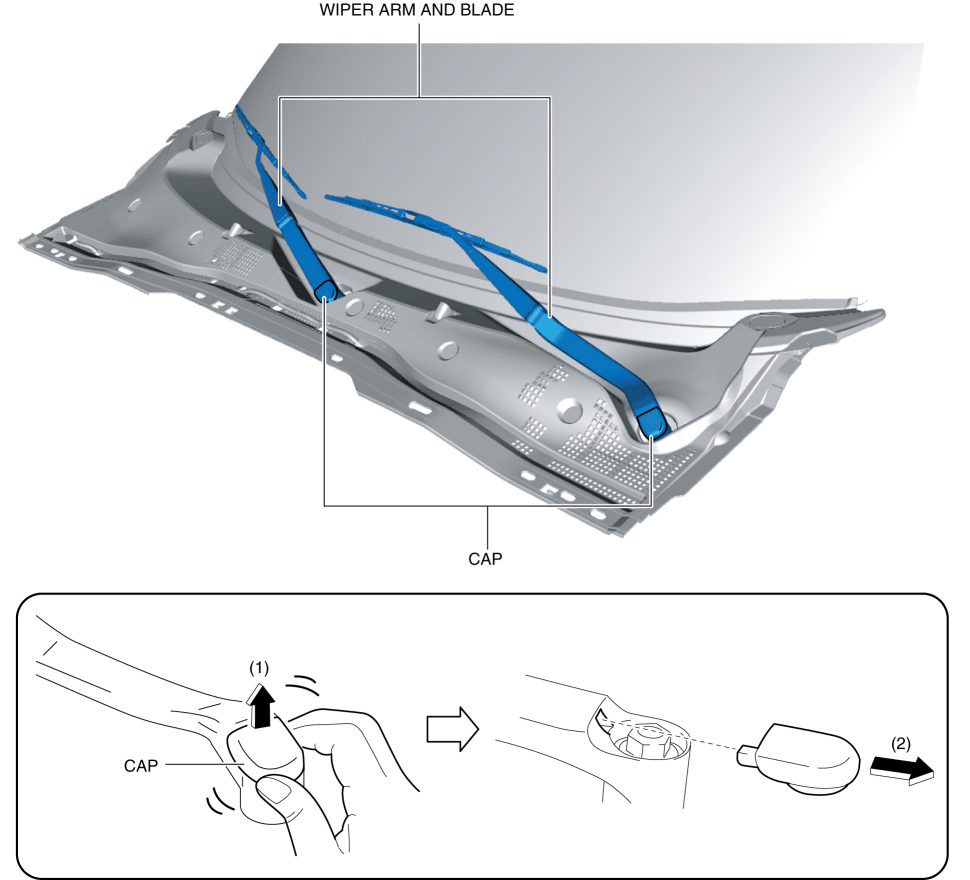
WIPER ARM AND BLADE REMOVAL/INSTALLATION
Wiper Arm
1. Open the hood.
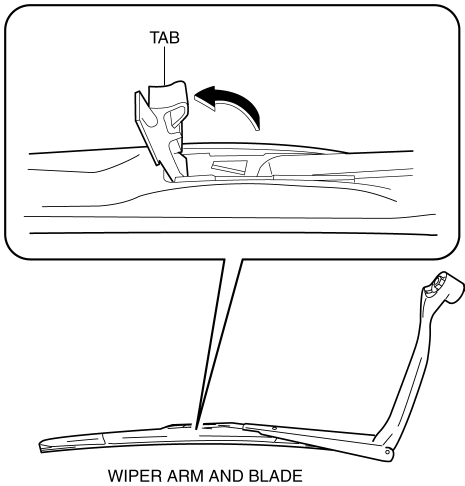
2. Carefully pull the cap up in the direction of arrow (1) shown in the figure while slightly shaking it, and detach the cap from the wiper arm.
CAUTION:
If excessive force is applied when removing the cap, the tabs could break. Carefully remove the cap.
3. Remove the cap from the wiper arm by pulling the cap in the direction of arrow (2) shown in the figure.
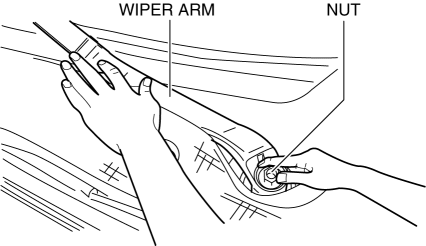
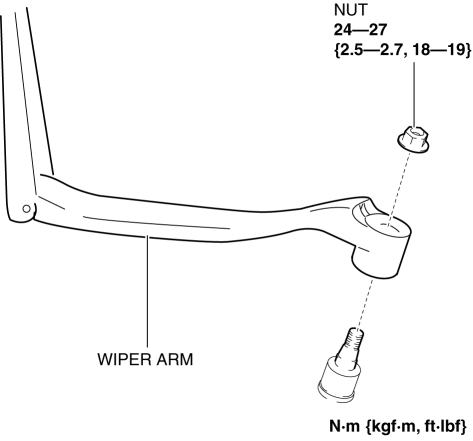
4. While pressing the wiper arm as shown in the figure, loosen the nut without completely removing it.
5. Close the hood.
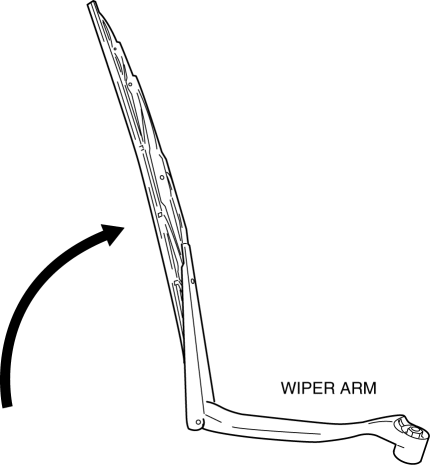
6. Raise the wiper arm as shown in the figure.
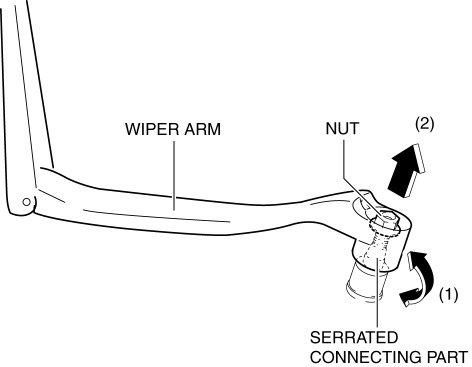
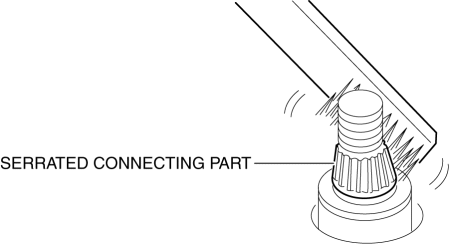
7. Move the wiper arm in the direction of arrow (1) shown in the figure and detach it from the serrated connecting part.
CAUTION:
If the wiper arm is pulled up with the nut completely removed, the wiper arm could contact the hood when it is removed. Always pull up the wiper arm with the nut not completely removed.
8. Pull up the wiper arm in the direction of arrow (2) shown in the figure to the temporarily tightened nut.
9. Remove the nut.
10. Remove the wiper arm. (See Wiper arm installation note.)
11. Install in the reverse order of removal.
12. Adjust the wiper arm and blade. (See WIPER ARM AND BLADE ADJUSTMENT.)
Wiper arm installation note
1. Clean the serrated connecting part with a wire brush before installing the wiper arm.
Wiper Blade
Type A
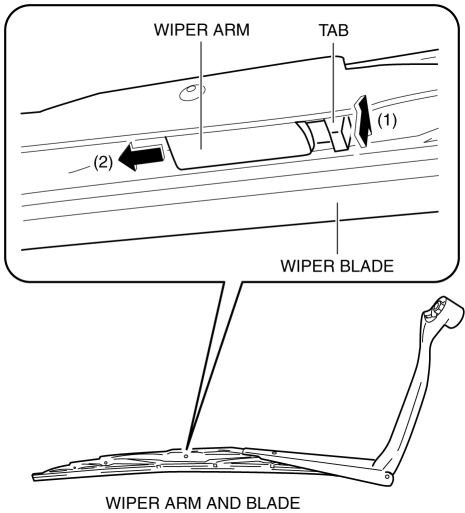
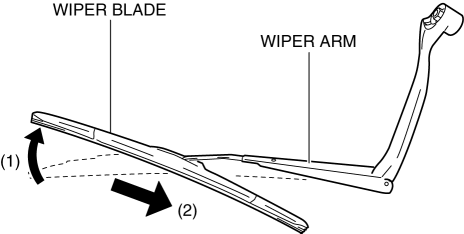
1. While pressing the wiper blade tab in the direction of arrow (1) shown in the figure, press the wiper arm in the direction of arrow (2) and detach the wiper blade from the wiper arm.
CAUTION:
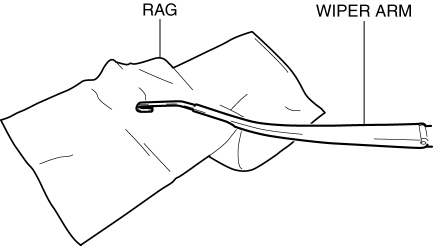
If the wiper arm end is placed directly on the windshield after removing the wiper blade, it could scratch the windshield. If the wiper arm end is to be placed on the windshield, place it on a rag to protect the windshield.

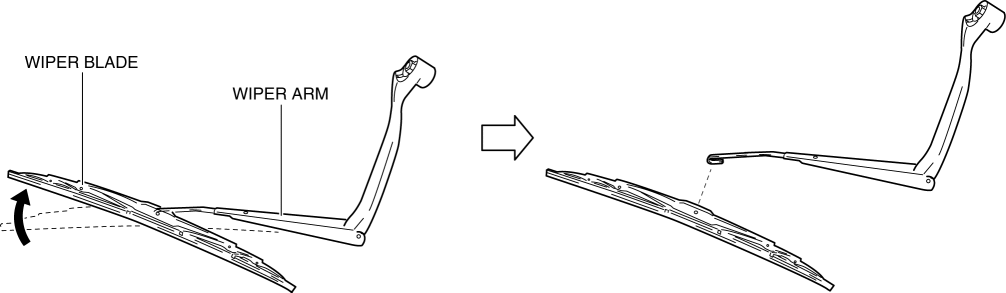
2. Tilt the wiper blade in the direction of the arrow shown in the figure and remove it from the wiper arm.
3. Install in the reverse order of removal.
Type B
1. Pull the wiper blade tab up in the direction of the arrow shown in the figure.
2. Tilt the wiper blade in the direction of arrow (1) shown in the figure, press it in the direction of arrow (2) shown in the figure, and detach the wiper arm from the wiper blade.
CAUTION:
If the wiper arm end is placed directly on the windshield after removing the wiper blade, it could scratch the windshield. If the wiper arm end is to be placed on the windshield, place it on a rag to protect the windshield.
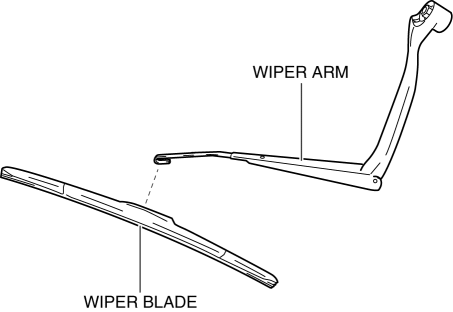
3. Remove the wiper blade.
4. Install in the reverse order of removal.< Previous Next >