REAR SHOCK ABSORBER AND COIL SPRING DISASSEMBLY/ASSEMBLY
CAUTION:
If the coil spring flies off while removing/installing the coil spring, it may cause serious injury or death, or vehicle damage. When removing/installing the coil spring, always use the SST and be careful not to allow the coil spring to fly off.
1. Disconnect the negative battery cable. (See NEGATIVE BATTERY CABLE DISCONNECTION/CONNECTION.)
2. Remove the trunk end trim. (See TRUNK END TRIM REMOVAL/INSTALLATION.)
3. When working on the left side of the vehicle, remove the trunk covering. (See TRUNK COVERING REMOVAL/INSTALLATION.)
4. When working on the left side of the vehicle, remove the partition board. (See PARTITION BOARD REMOVAL/INSTALLATION.)
5. Remove the trunk side trim. (See TRUNK SIDE TRIM REMOVAL/INSTALLATION.)
6. When working on the left side of the vehicle, remove the fuel-filler pipe protector. (See FUEL-FILLER PIPE REMOVAL/INSTALLATION [SKYACTIV-G 2.0].)
7. When working on the left side of the vehicle, remove the auto leveling sensor and the auto leveling sensor short cord as a single unit. (See AUTO LEVELING SENSOR REMOVAL/INSTALLATION.) (See AUTO LEVELING SENSOR SHORT-CORD REMOVAL/INSTALLATION.)
8. Remove the rear shock absorber and coil spring. (See REAR SHOCK ABSORBER AND COIL SPRING REMOVAL/INSTALLATION.)
9. Remove in the order indicated in the table.
10. Install in the reverse order of removal.
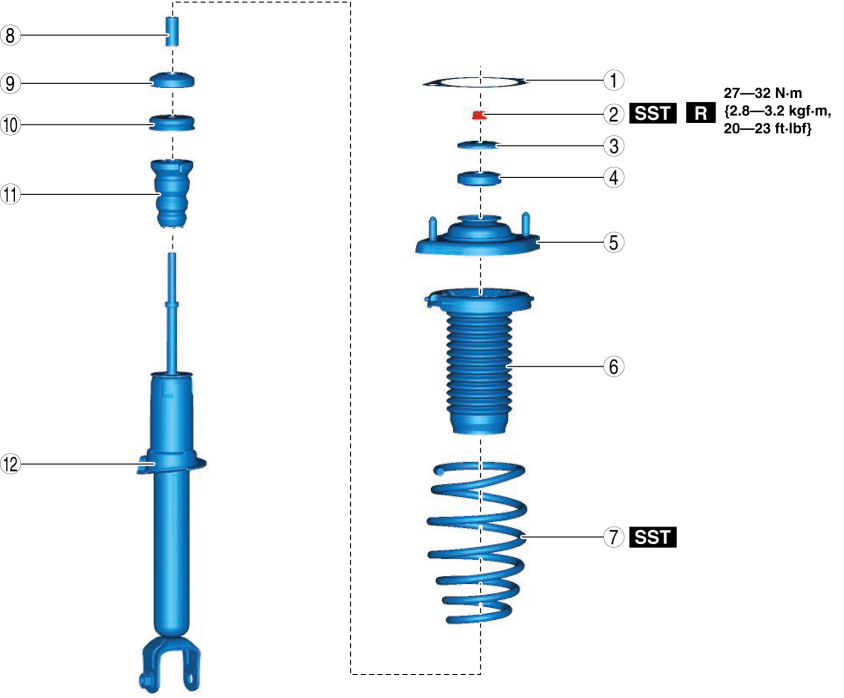
| 1 |
Seat |
| 2 |
Piston rod nut (See Piston Rod Nut Removal Note.) |
| 3 |
Retainer |
| 4 |
Bushing |
| 5 |
Upper spring seat |
| 6 |
Spring seat rubber |
| 7 |
Coil spring |
| 8 |
Spacer |
| 9 |
Bushing |
| 10 |
Stopper casing |
| 11 |
Bound stopper |
| 12 |
Rear shock absorber |
Piston Rod Nut Removal Note
WARNING:
When removing the piston rod nut, if the piston rod nut is removed before compressing the coil spring, the coil spring may fly off, which may cause serious injury or death, or vehicle damage. Set the Rear shock absorber and the coil spring to the SST first, then remove the piston rod nut.
1. Install the rear shock absorber and coil spring to the SST according to the following procedures.CAUTION:
The coil spring may be damaged when installing the SST to the coil spring. Install the SST to the coil spring using a rag so that the coil spring is not damaged.
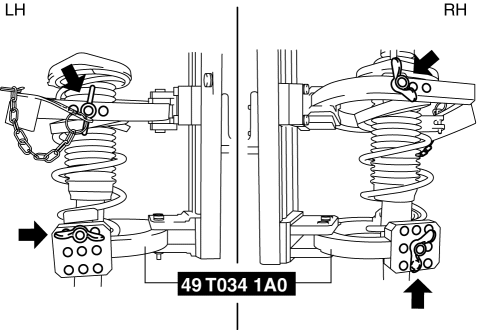
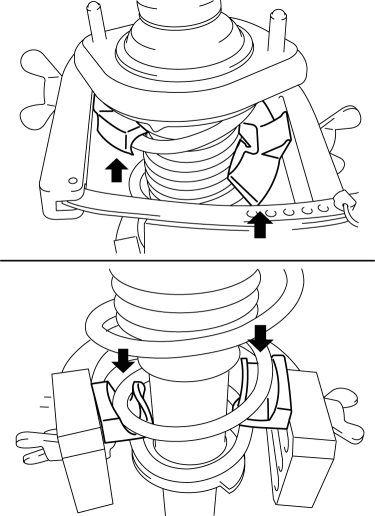
a. Set the SST attachments (tabs) to the positions shown in the figure.
 b. Install the rear shock absorber and coil spring to the SST so that the coil spring is set to the position shown in the figure.
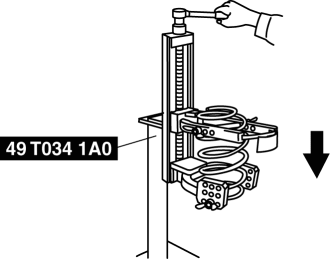
2. Compress the coil spring using the SST.
3. Remove the piston rod nut.
Coil Spring Installation Note
1. Compress the coil spring using the SST.
2. Install the coil spring so that the lower end of the coil spring and the step of the front shock absorber are placed at position A shown in the figure.
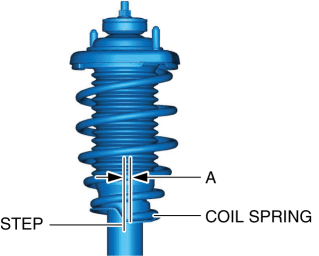
A: 3 mm {0.1 in} max.
Upper Spring Seat Installation Note
1. Install the upper spring seat so that the upper spring seat bolt and damper bottom bracket installation shaft are placed at position B shown in the figure.< Previous Next >
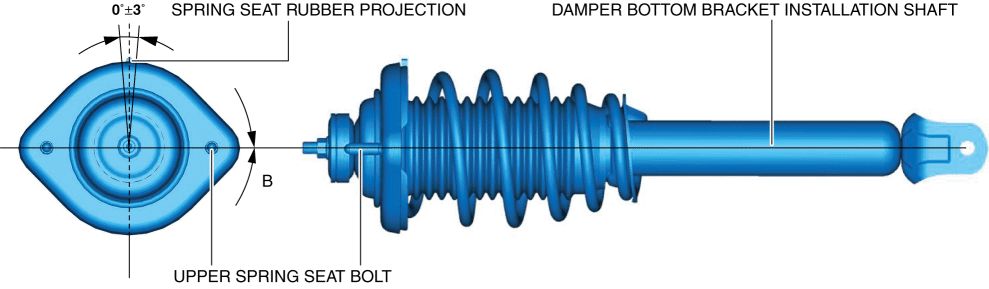
B: 0°±3°