< Previous
Next >
DOOR GLASS REMOVAL/INSTALLATION
Removal
1. Perform the door glass preparation. (See Door Glass Preparation.)
2. Disconnect the negative battery cable. (See NEGATIVE BATTERY CABLE DISCONNECTION/CONNECTION.)
3. Remove the door trim. (See DOOR TRIM REMOVAL/INSTALLATION.)
4. Remove the door module panel. (See DOOR MODULE PANEL REMOVAL/INSTALLATION.)
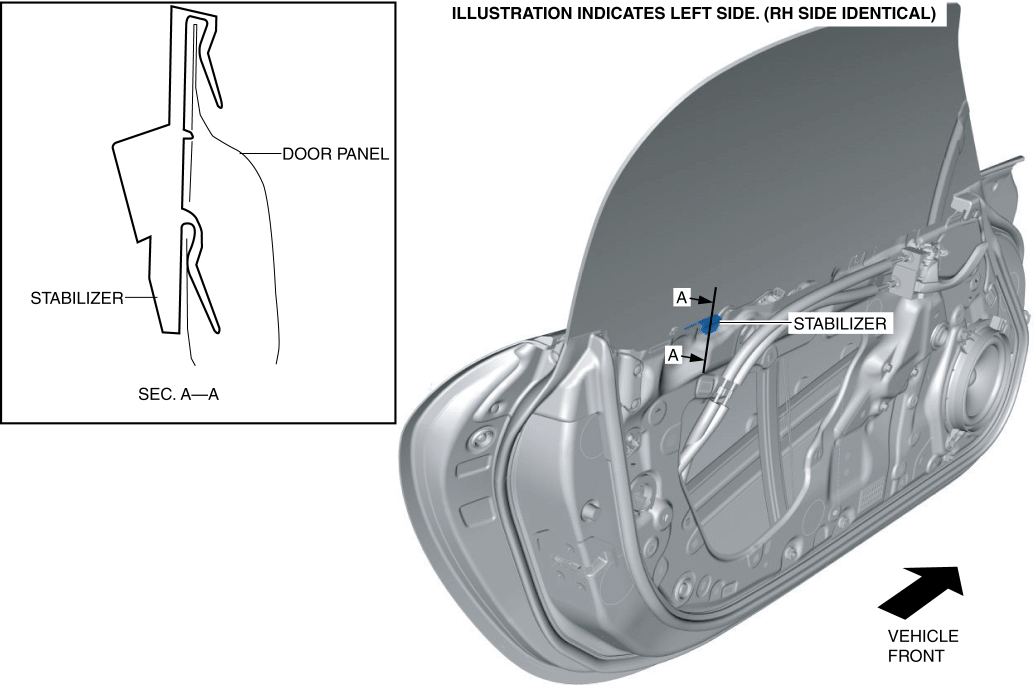
5. Insert a precision flathead screwdriver into the position shown in the figure and detach the stabilizer tab.
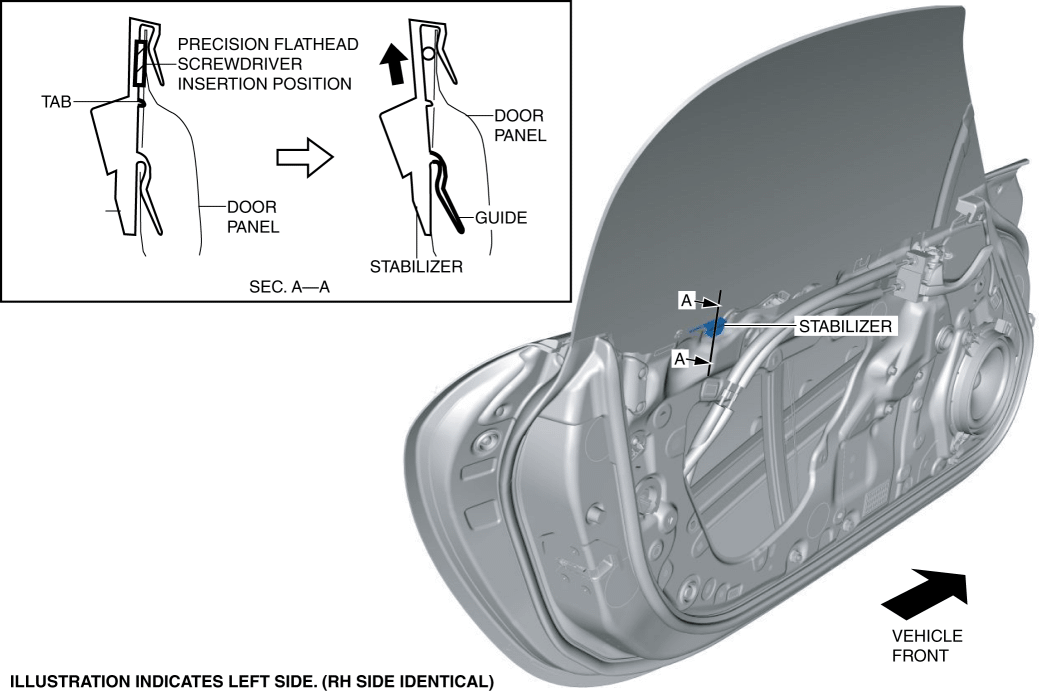
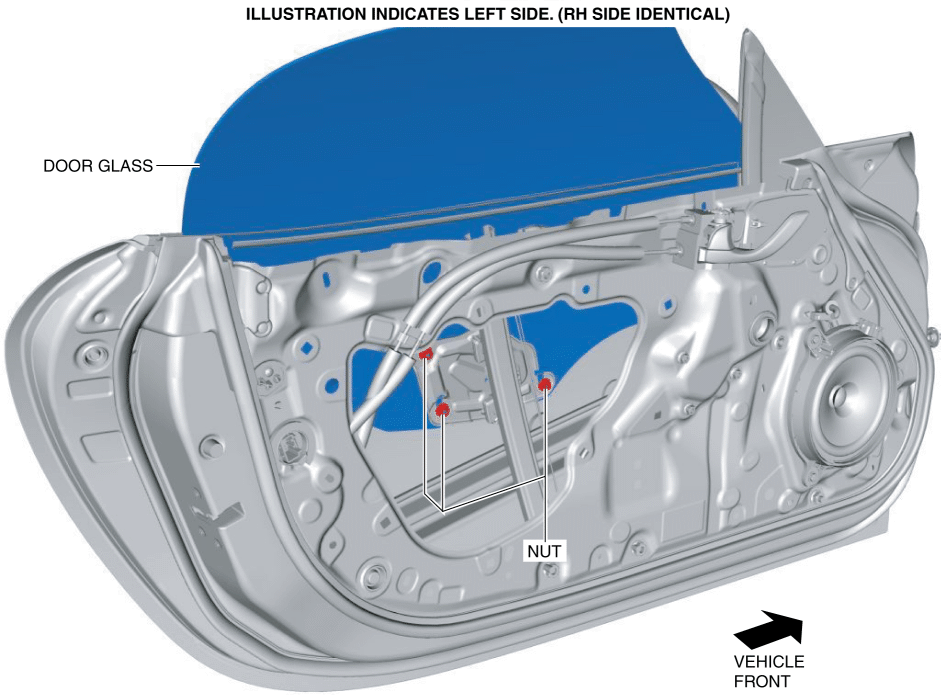
6. Remove the nuts.
7. Lift up the door glass in the direction of arrow (1) avoiding the carrier plate shown in the figure, and while tilting it in the direction of arrow (2), move it in the direction of arrow (3) to remove it from the door.

Installation
1. Set the door glass to the carrier plate and temporarily tighten the nuts.
2. Connect the power window main switch connector or power window subswitch connector.
3. Disconnect the pressure sensor connector. (with pressure sensor) (See PRESSURE SENSOR REMOVAL/INSTALLATION [TWO-STEP DEPLOYMENT CONTROL SYSTEM].)
4. Connect the negative battery cable. (See NEGATIVE BATTERY CABLE DISCONNECTION/CONNECTION.)
5. Operate the power window main switch or power window subswitch to fully close the door glass.
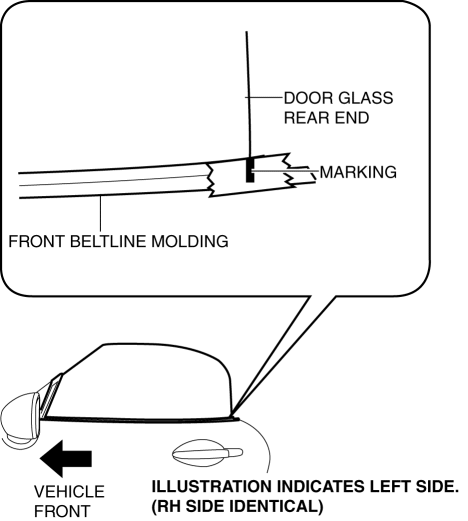
6. Align the position of the door glass rear end with the marking shown in the figure.
7. Operate the power window main switch or power window subswitch to adjust the door glass to the position shown in the figure.
8. Disconnect the negative battery cable. (See NEGATIVE BATTERY CABLE DISCONNECTION/CONNECTION.)
9. Disconnect the power window main switch connector or power window subswitch connector.
10. Connect the pressure sensor connector. (with pressure sensor) (See PRESSURE SENSOR REMOVAL/INSTALLATION [TWO-STEP DEPLOYMENT CONTROL SYSTEM].)
11. Completely tighten the nuts.

12. Install the stabilizer.
13. Install the door module panel. (See DOOR MODULE PANEL REMOVAL/INSTALLATION.)
14. Install the door trim. (See DOOR TRIM REMOVAL/INSTALLATION.)
15. Connect the negative battery cable. (See NEGATIVE BATTERY CABLE DISCONNECTION/CONNECTION.)
16. Close the door with the convertible top closed.
17. Operate the power window main switch or power window subswitch and verify that the door glass moves up/down smoothly.
If the door glass does not move up/down smoothly, adjust the door glass position. (See DOOR GLASS ADJUSTMENT.)
18. Perform the power window system initial setting.(See POWER WINDOW SYSTEM INITIALIZATION PROCEDURE.)
Door Glass Preparation
1. Operate the power window main switch or power window subswitch to fully close the door glass.
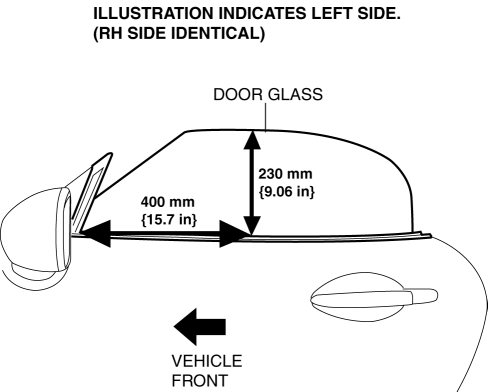
2. Mark the position of the door glass rear end on the front beltline molding and position the door glass.
3. Operate the power window main switch or power window subswitch to adjust the door glass to the position shown in the figure.< Previous Next >
NOTE:
Door glass installation nuts removal can be facilitated by adjusting the door glass position.