< Previous
Next >
A-PILLAR GARNISH INSTALLATION
Reusing A-pillar Garnish
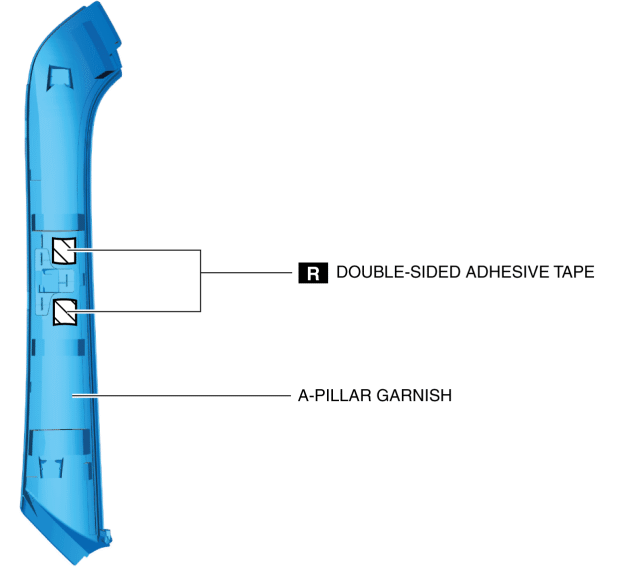
1. Remove the double-sided adhesive tape applied to the A-pillar garnisih.
2. Clean and degrease the double-sided adhesive tape application area of the A-pillar garnisih.
3. Affix the double-sided adhesive tapes to the position shown in the figure.
4. Open the door.
5. Open the convertible top.
6. Clean and degrease the double-sided adhesive tape application areas of the body.
7. Peel off the backing of the double-sided adhesive tapes.
CAUTION:
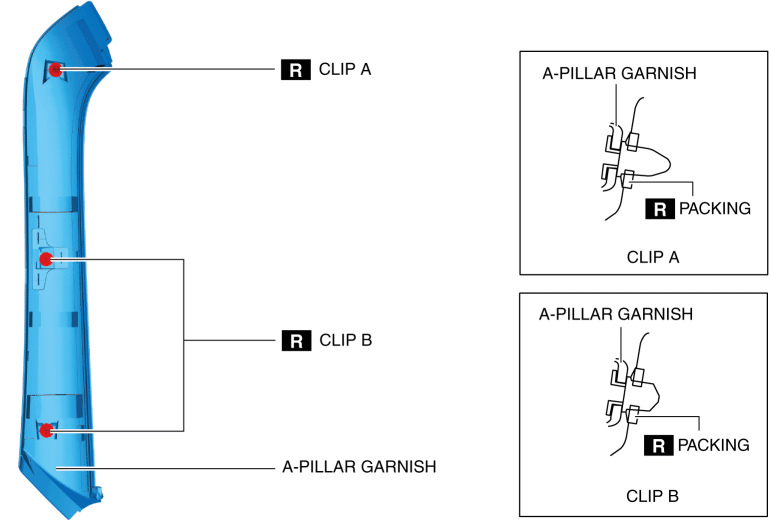
Replace all the clips with new ones when reusing the A-pillar garnish. Otherwise, the A-pillar garnish may not be installed normally.
8. Install clip A and clips B to the A-pillar garnish. (when reusing A-pillar garnish)
9. Install the A-pillar garnish by pressing it in the direction of the arrows shown in the figure.
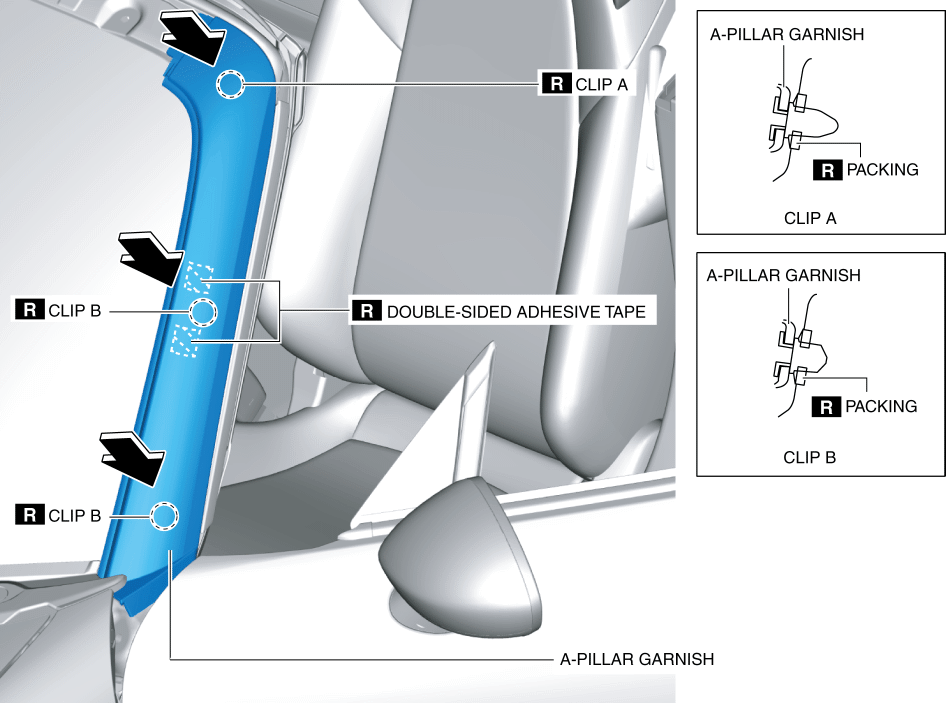
10. Press the A-pillar garnish to adhere the double-sided adhesive tapes.
11. Install the following parts:a. Windshield garnish (See WINDSHIELD GARNISH REMOVAL/INSTALLATION.)b. Front header trim (See FRONT HEADER TRIM REMOVAL/INSTALLATION.)c. Female wedge (See FEMALE WEDGE REMOVAL/INSTALLATION.)d. A-pillar trim (See A-PILLAR TRIM REMOVAL/INSTALLATION.)
12. Connect the negative battery cable. (See NEGATIVE BATTERY CABLE DISCONNECTION/CONNECTION.)
Not Reusing A-pillar Garnish
1. Open the door.
2. Open the convertible top.
3. Clean and degrease the double-sided adhesive tape application area of the body.
4. Peel off the backing from the double-sided adhesive tape applied to the A-pillar garnish.
CAUTION:
Replace all the clips with new ones when reusing the A-pillar garnish. Otherwise, the A-pillar garnish may not be installed normally.
5. Install clip A and clips B to the A-pillar garnish. (when reusing A-pillar garnish)
6. Install the A-pillar garnish by pressing it in the direction of the arrows shown in the figure.
7. Press the A-pillar garnish to adhere the double-sided adhesive tapes.
8. Install the following parts:a. Windshield garnish (See WINDSHIELD GARNISH REMOVAL/INSTALLATION.)b. Front header trim (See FRONT HEADER TRIM REMOVAL/INSTALLATION.)c. Female wedge (See FEMALE WEDGE REMOVAL/INSTALLATION.)d. A-pillar trim (See A-PILLAR TRIM REMOVAL/INSTALLATION.)
9. Connect the negative battery cable. (See NEGATIVE BATTERY CABLE DISCONNECTION/CONNECTION.)< Previous Next >